Saturday 29 April 2017

A Singer Featherweight

This sewing machine is just fantastic, so well designed with amazing attention to detail. As well as being made whilst studying for a pretty serious set of exams.

Creates Sew Slow: Singer Featherweight Cake

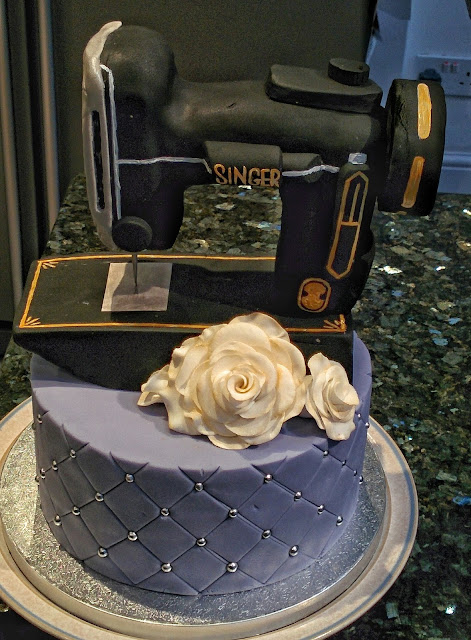
OK so it is not a real Singer Featherweight.  I do have the real thing, which is what made Cath suggest it as the design idea for my birthday cake. Cath's daughter Jen is a sugarcrafter extraordinaire who uses cake making as a method of relaxation. Cath's blog contains many examples of Jen's creativity and she has blogged about my cake. Jen did have some help with the finishing touches from her sister Christina who is starting to develop her own sugarcraft skills.

Jen designed my Singer Featherweight cake from pictures on the internet having never seen one in real life, which makes the realism achieved even more amazing.  There was no time to make a foot but a cocktail stick was an excellent needle that also provided much needed structural support. The scroll work on the faceplate is so close to the real thing.


Creates Sew Slow: Singer Featherweight CakeCreates Sew Slow: Singer Featherweight Cake
 
Creates Sew Slow: Singer Featherweight Cake

It was such an amazing cake that it was three days before we could bear to cut into it! The sewing machine survives the cake cutting intact as do the roses but it still seemed a shame to destroy the careful quilting in the blue icing.
Creates Sew Slow: Singer Featherweight Cake


Creates Sew Slow: Singer Featherweight Cake

Creates Sew Slow: Singer Featherweight Cake

The sewing machine was quite heavy for the cake and there was a definite slump at the faceplate end of the cake when we finally cut into it.  The cake itself was a Victoria sponge and very tasty. The sewing machine is not for eating although made of edible ingredients (rice krispies and marshmallow).

It was great to spend my birthday last year in England with family and friends. This cake was just the icing on top!

Thanks Cath and Jen for an amazing cake which made for a very special birthday.
Saturday 22 April 2017

Scottie Bag's Easter Adventure

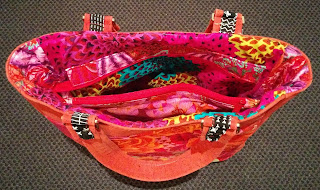
My Scottie bag had its first big adventure this Easter weekend with a trip to the Far North (of New Zealand).  This bag was not personally sewn by me it was a Christmas present from a talented friend Andrea of Fizzy Designs.  I have a particular fondness for Scottie dogs as we had two of them for many years.

Andrea made my bag using mainly red Kaffe Fassett fabrics and the Scottie dog foundation piecing pattern from The Tartan Kiwi. I can't find the Scottie dog pattern in The Tartan Kiwi's Etsy shop but there are some other amazing foundation pieced patterns that would make a great bag, cushion, quilt, jacket or whatever.

Creates Sew Slow: Scottie Bag

Creates Sew Slow: Scottie Bag

Creates Sew Slow: Scottie Bag

Creates Sew Slow: Scottie Bag

So for those who don't want to take a brief trip to the Far North look away now.

Scottie bag really enjoyed Beach Abode in Ahipara, somewhere relaxing to stay in tranquil and beautiful surroundings at the beginning of 90 Mile Beach.

Creates Sew Slow: Scottie Bag's Easter Adventure

Creates Sew Slow: Beach Abode Ahipara

Creates Sew Slow: 90 Mile Beach Ahipara

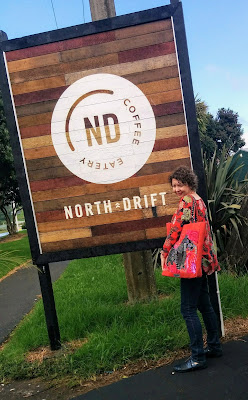
Loved the food at the North Drift (formerly the Gumdiggers Café) a great place to eat in Ahipara. Can you tell this photo was taken in an unexpected heavy shower of rain?

Creates Sew Slow: Scottie Bag's Easter Adventure

The beach on the East coast at Cable Bay was pretty good too.  And the view from Rangikapiti Pa was spectacular.

Creates Sew Slow: Cable Bay

Creates Sew Slow: Cable Bay

Creates Sew Slow: Rangikapiti Pa

Then there is the famous Mangonui Fish shop, in a wonderful position over the water with great views.

Creates Sew Slow: Mangonui Fish shop


This is an unexpected sight at Mitimiti. a Chinese gate overlooking the sea giving thanks to the people of Te Rarawa who looked after the human remains that were washed ashore after the SS Ventnor sank in 1902.  The SS Ventnor sank off the Hokianga coast on its way back to China with the remains of 501 Chinese mainly Otago goldminers who were being returned home to be buried  near their family.

Creates Sew Slow: Mitimiti Chinese Gate

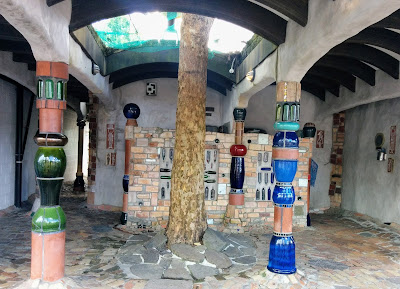
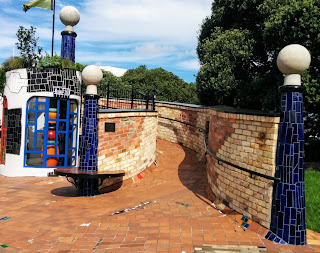
Of course no trip to Northland would be complete without the Hundertwasser toilets at Kawakawa.

Creates Sew Slow: Scottie Bag's Easter Adventure

Creates Sew Slow: Hundertwasser Toilets Kawakawa

Creates Sew Slow: Hundertwasser Toilets KawakawaCreates Sew Slow: Hundertwasser Toilets Kawakawa

Creates Sew Slow: Hundertwasser Toilets Kawakawa

Whangarei now has its own Hundertwasser sculpture, Te Kakano (the Seed) at the Town Basin. Te Kakano, is a stand-alone sculpture in the shape of a koru, built by the tradesmen and artists who will work on the bigger Hundertwasser Art Centre with Warau Maori Art Gallery (designed by Hundertwasser in 1993).

Creates Sew Slow: Scottie Bag's Easter Adventure

Creates Sew Slow: Hundertwasser Te Kakano Whangarei

Creates Sew Slow: Hundertwasser Te Kakano Whangarei

Hundertwasser in New Zealand and the story of the Whangarei Art Centre.


And a visit to Whangarei has to include a picture of the boats moored in the Town Basin. Oh and a me made garment from 2016, the Swirl top, blogged about here.

Creates Sew Slow: Scottie Bag's Easter Adventure

To finish here is a selfie.

Creates Sew Slow: Scottie Bag's Easter Adventure

Saturday 15 April 2017

Papercut Bowline NY Circuit Sweater

I was very taken with The Papercut Collective Bowline sweater from the moment I saw it. Being a home grown New Zealand pattern company do feel I should support them.  Although generally I think Papercut are aiming for a younger demographic than me there are a few of their patterns I have bought and made. It has taken me nearly a year since buying the Bowline paper pattern at The Fabric Store to actually create a garment from it.

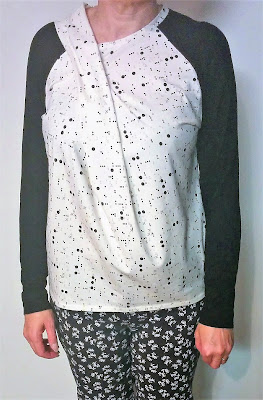
The finished garment
This is a really great basic t-shirt type top but the bow gives that extra little bit of interest I am always looking for in my clothes.
 
Creates Sew Slow: Papercut Bowline NY Circuit SweaterCreates Sew Slow: Papercut Bowline NY Circuit Sweater

The fabric
I used a cream medium knit, with a pattern of black dots and marigold / beige crosses, for the body of the sweater and the neckband. This fabric is another fantastic AGF cotton knit with 5% spandex, bought last year from The Sewing Workshop.  It is called NY Circuit and makes me think of the punched cards used for programming computers in years gone by.  Love this description by AGF: an elegant palette of azure, marigold and black, Gramercy eloquently captures the magic of the city. Shimmering lights, aerial views and the beautiful circuitry underneath it all create a metropolitan enchantment that sculpts this collection.

AGF Fabrics: Gramercy Collection NY Circuit Ashen

I wanted the bow to be the star of the show so used a black rayon knit from Silhouette Patterns for the sleeves as it makes the body of the top stand out more.

The pattern
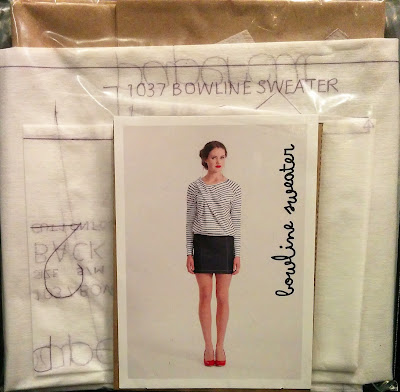
Papercut describe the pattern as inspired by seafaring knots and bow waves, our Bowline Sweater offers structure and casual wear rolled into one. The unique pleated front is a show-stopper and would suit print or plain fabric alike. This fun sweater comes with a raglan sleeve, self-waistband and wide cuffs.
Creates Sew Slow: The Papercut Collective Bowline Sweater

It is rated for skilled sewers but I think anyone could make this if they worked slowly and methodically through the pattern instructions and blog tutorial.

The pattern alterations
I used a size small for the shoulders and raglan sleeves tapering out to a medium at the waist and hips.  I think there is enough ease in this top that I could have used the small throughout, even though my measurements align more closely with the medium.

Not being a big cuff fan I eliminated the sleeve and bottom bands by extending the length of the body and sleeves.  I tapered the sleeves to be the same width as the cuff at the wrist. For the body I made a slight high low hem with a 2.5" shirt tail in the back.

The sewing
Not only did I use the pattern instructions, I also followed the picture tutorial on the Papercut blog.  Most of it was simple to sew, it was only the bow that took a bit more thought. The pictures on the blog really helped as I struggled to get a picture in my head for that step from the instructions.  I made mine on the overlocker just using the straight stitch on the sewing machine (with a ballpoint needle) for the sleeve and bottom hems.  I think it would have been easier to sew dart A and seam B using the sewing machine and then use the overlocker when sewing them together. Live and learn.

The styling
Worn with my Andrea Moore doggy skinny pants, and Katie 'n Me jungle print booties with red heels.
Creates Sew Slow: Bowline NY Circuit Sweater

I prefer it with my Andrea Moore black cropped skinny pants and Trippen Fight shoes.
Creates Sew Slow: Bowline NY Circuit Sweater

My beloved started to loose interest in taking photos at this point hence the arty leaning angle.

Saturday 8 April 2017

Ready to Sew Janis Feather Top

When I sewed the original Janis top it started a number of ideas percolating, so I had to sew another one to explore some of them.

The finished garment
We didn't bother trying to do these photos with my head in them as it makes the photo shoot less frustrating for my beloved.  He does love photography but prefers landscapes (or subjects that don't keep closing their eyes) and his fancy camera. I get him to use my phone for blog photos because it is easier to transfer them into the computer.

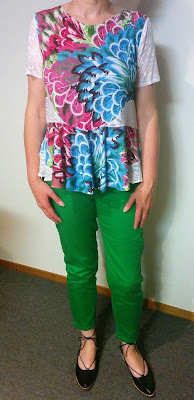
I really love this top, the colours and drape are great and my pattern alteration ideas worked out.

Creates Sew Slow: Ready to Sew Janis Feather Top

Creates Sew Slow: Ready to Sew Janis Feather TopCreates Sew Slow: Ready to Sew Janis Feather Top

The fabric
This is a silk jersey purchased from Silhouette Patterns in early 2016.  I only bought a yard for some strange reason so always knew it would have to be paired with another fabric to make a garment. I think it looks good with the white sleeves and curved piece in the side body but I wish there had been enough of the feather fabric for the peplum without needing to piece in a bit of white knit.

The white is a burnout knit which looks great but is a real pig to sew as it curls terribly.  I have no idea where this knit came from or what it is made of.

The pattern
Janis by Ready to Sew is described as a peplum style top with two collar options, both available in short and long sleeves.  It's fitted at the shoulders and falls into a relaxed fit below the bust. I made an adaptation of view one with the round neckline.

The pattern alterations
This top used the same alterations to shoulders and sleeves as the one I made originally, but lowered the front neck edge by another 1/4".  For this version I wanted to use a different fabric in the curved section at the side body and have the peplum sewn on in a straight line.

For the curved waist piece I marked the seam allowances on the front and back pattern pieces then butted them together, matching the seam allowances at the top and bottom of the side seams.  I then used the seam line to draw the shape of the insert piece on light weight sew in Vilene and added seam allowances.  I marked alignment notches on both the front and back body pieces matching them on the insert piece to ensure they could be sewn together properly.

For the peplum the depth was reduced by 2.5".  I also realised that it wouldn't need to be as wide so I measured the front and back pieces with the insert piece in place to determine the circumference of the peplum at the seam. The total circumference was 6" less than for the original peplum, so I removed 3/4" at each side edge.  Both of these alterations were made because the peplum no longer needed to travel around the curved edge at the side seams.

The sewing
Another simple top, apart from fighting the white fabric to lay flat, sewn on the overlocker.  Hems (sleeve, bottom and neck edge) turned under and hemmed with a straight stitch and ballpoint needle in the sewing machine.

The styling
Here it is worn with Meredith green 3/4 pants and Andrea Moore Geisha Point shoes.
Creates Sew Slow: Janis Feather Top

Saturday 1 April 2017

Silhouette Georgio's Busy City Dress

Unbelievably for me I purchased this fabric from Silhouette Patterns and sewed it up within three months using Georgio's Top also from Silhouette Patterns, lengthened into a dress.  I love this top and have made it a number of times so it seemed natural to lengthen it into a dress.

The finished garment
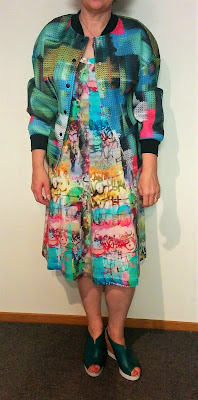
A great dress although not quite as I envisaged when I lengthened the pattern. I really wanted more of that peplum swish from the hip down.  Apart from having princess seams it doesn't look that different from the dresses made from a mash-up of Silhouette Patterns Sweater Set #195 and Yoga skirt #2010. Once it was finished I did wonder if the Swing dress #4000 wouldn't have given me the image in my head - off to find some fabric to try this idea.

Creates Sew Slow: Georgio's Busy City DressCreates Sew Slow: Georgio's Busy City Dress

The fabric
A French digital print 3oz viscose knit called The Busy City - great graffiti print which I managed to place without inappropriate bits hitting key parts of the anatomy.

The pattern
Georgio's top, pattern number 312 is described as From the Spring 2012 Armani runway, this kimono/princess seam knit top with the peplum hemline is flattering on every figure type. The cup sizing is built into the princess seaming in the front. This pattern is for 1 or 2 way stretch knits and works with all kinds of knit weights. Silk knits, rayon knits, and cotton knits work well.


Creates Sew Slow: Geogrio's top

The pattern alterations
The top pattern was adapted to fit me long ago, from a size 3 D-cup with 1/4" removed from the shoulder at each of the princess seams tapering to nothing where the shaping for the bust starts. This removed the extra fabric from the upper chest hollow.

All I did this time was add 12.5" to the length of all pattern pieces. The pattern pieces were blended out to be 1.5" wider at the new hemline. I was hoping to keep the flared nature of the peplum in this dress but it is lost, maybe because I didn't angle the seams out far enough keeping the gradient of the peplum extended down to the hem. There is possibly another make in my future to achieve that fuller skirt by using the gradient of the peplum to determine the hem width of each pattern piece.

I also altered the neckline to a scoop neck so that I could add a twisted band at the neck.  This is the twisted cowl neck treatment described by Katherine Tilton in the Craftsy Artful T-shirt class.  I only wanted a neck band not a cowl so I only cut my neckband 2.5" wide.  I folded the band in half and marked the quarter points on one side then marked the other side 1.5" away at each of the quarter points and twisted the band so the quarter points matched up. It looks great finished but was a bit tricky to sew this narrow twisting band - maybe I should only have had the marks 1" apart.

Creates Sew Slow: Georgio's Busy City Dress Twisted Cowl

The sewing
The dress was quickly sewn on the overlocker. The only slightly tricky bit was the neckband as mentioned above.

The styling
Nothing really notable about the styling just a simple summer dress for work or play.  More work when paired with my turquoise sandals or maybe city play. Hopefully Summer will stick around for a few more weeks so I can wear it, either with my Untouched World wrap or World bomber jacket.

Creates Sew Slow: Georgio's Busy City DressCreates Sew Slow: Georgio's Busy City Dress